

Chat & Results
Using the Chat Input
Choose files, a project, and a model. Send a request or steer work already in progress.
Overview
Type your request in the message box. Add files, choose a project, and select the model before you send it.
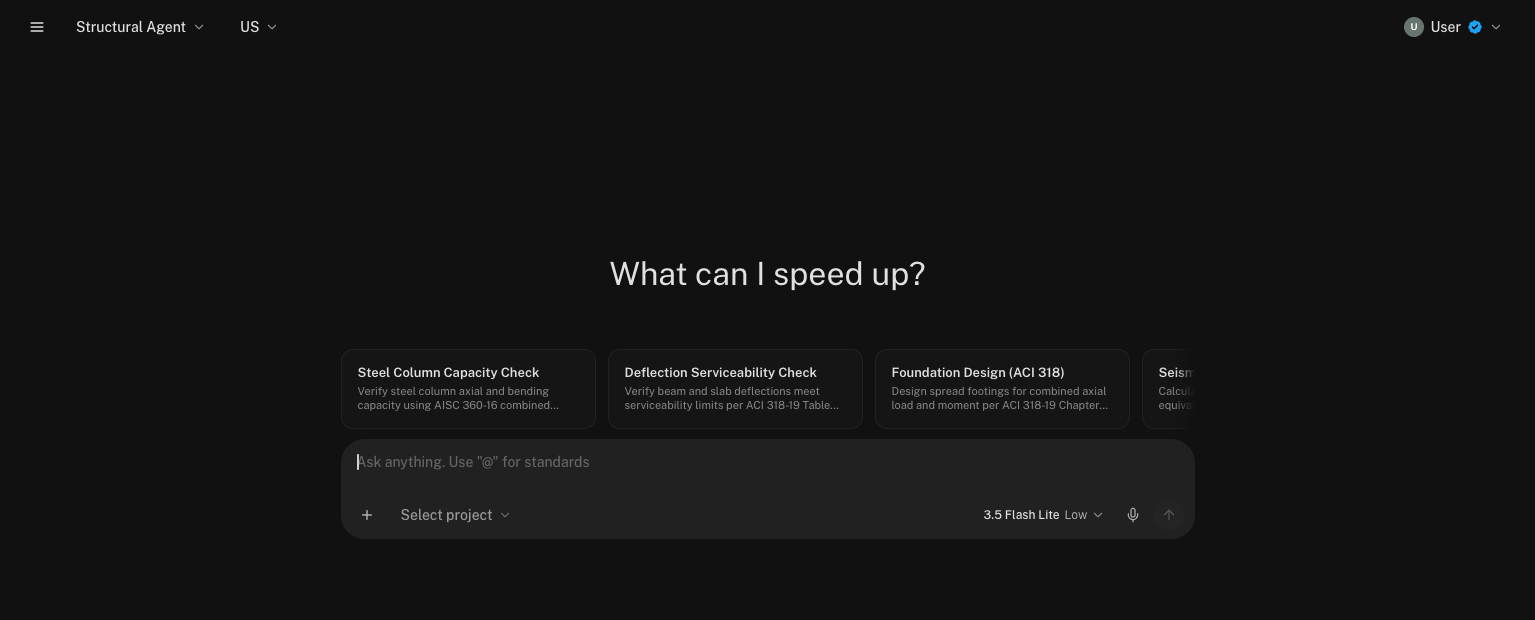
The header sets the context for the conversation: the agent you’re talking to (top-left dropdown) and the design standard next to it, which sets the code region your answers cite: US, Eurocode, Australia/NZ, Canada, Philippines, Singapore, or Malaysia.
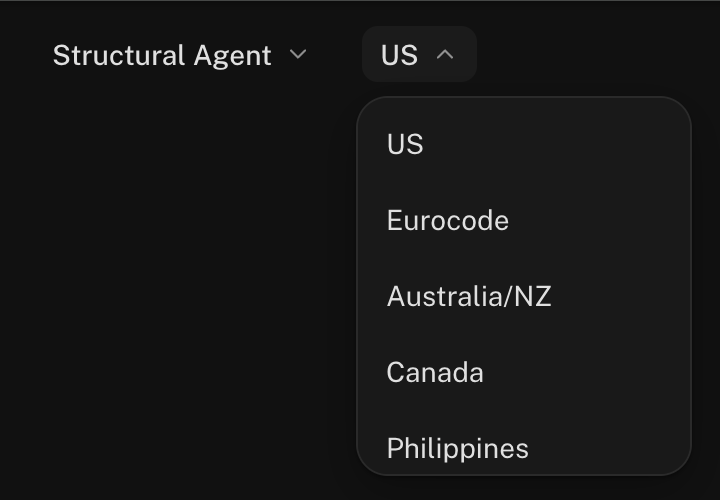
Pick the folder
The Select project pill next to + sets the folder the conversation works in. Every file the agent reads, creates, or edits lives in that folder, and you see the same files in Files.
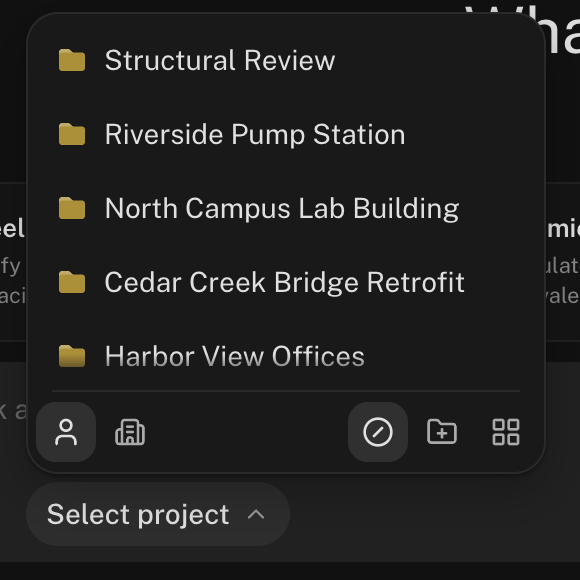
- Pick a project to work on a job’s files. Several conversations can work in the same project and see each other’s files. See Work in a Project Folder.
- Pick nothing and the conversation gets its own folder under Documents, named after the chat.
- The buttons along the bottom of the menu switch between personal and organization projects and create a new project.
You choose once, with the first message. After that the pill goes away and the folder becomes the file tree in the Canvas. The BIM Agent always works in a project; the other chat agents work either way.
Pick the model
The model picker at the bottom-right of the message box shows the model and its reasoning level, for example 3.5 Flash Lite Low. Click it and drag the slider: each model comes in Low, Medium, and High reasoning.
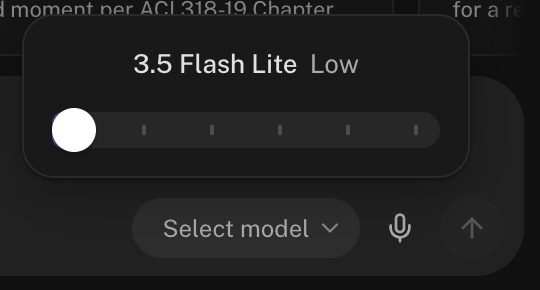
Higher reasoning gives the model more time to work through a problem. Use it for multi-step design problems; keep Low for lookups and quick checks. You can change the model between messages in the same conversation.
Typing and sending
Enter sends. Shift + Enter adds a line break for prompts with a list of requirements. The send button (↑, bottom-right) becomes a stop button while the agent is responding.
Steer a run that is already going
Type while the agent works and press Enter. Your message waits in a tray above the message box, marked Queued, and sends the moment the current response finishes.
- Click Steer to hand the message to the agent now. It reads the message at its next step and adjusts course (“use A992 steel, not A36”).
- Click Delete to drop it.
- Press ↑ in an empty message box to edit your last queued message.
When the agent asks you a question
On a long task the agent sometimes needs a decision from you: which code edition, which of two layouts, whether to include a check. It asks on a card above the message box and keeps working while it waits.
Pick an option, or type your own answer in the last row, and click Submit. Your answers go back to the agent together. To take the conversation somewhere else instead, click Stop and reply: the agent stops and the cursor moves to the message box for your reply. Put the card away and the agent carries on with its own defaults; the card shrinks to a pill you can reopen.
Adding files
Attach with the + button at the bottom-left of the message box, then Upload from computer. Dragging files anywhere on the page and pasting images work too.
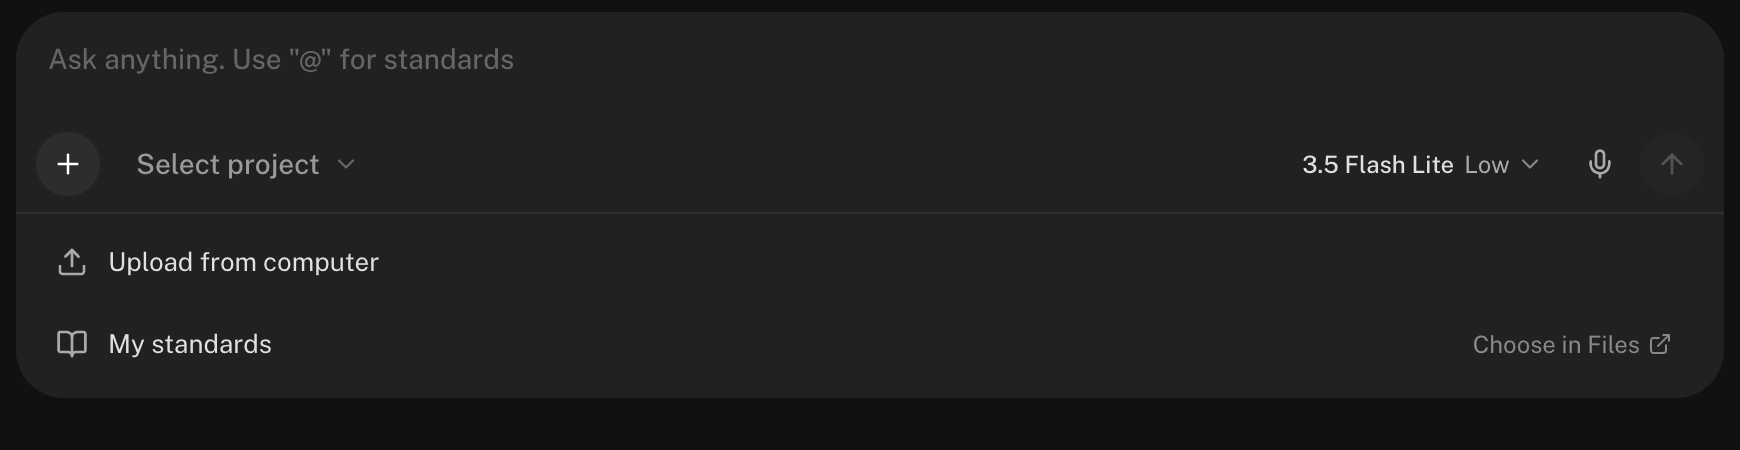
Up to 10 files per message: PDFs, images, Excel/CSV, Word, PowerPoint, Mathcad (.mcdx, .xmcd, .xmcdz), and model files (IFC, RVT, DXF, DWG). Each attachment shows a card with upload progress. Attachments go into the conversation’s folder, so the agent and your Files see the same copy.
Your standards
The + menu also holds your standards toggles:
- My standards: your own standards folder of templates and formats.
- Organization standards: your organization’s shared standards folder, offered when the conversation works in an organization project.
Each toggle is set per conversation and starts off. Switch it on and the agent reads that folder as reference for everything it produces in this chat. The folder name next to the toggle opens it in Files. With no folder chosen yet, the row reads Choose in Files.
Two different things share the word “standards”. The My standards and Organization standards toggles point at your own folders of templates. The Standards section of the @ picker is the built-in design code library (ACI, AISC, ASCE). See Mentions for the second one.
Dictation
Click the microphone at the bottom-right and talk. A live waveform confirms it’s recording, and your words appear in the message box as you speak.
Click the stop button (the square that replaces the microphone) to finish. The transcript lands in the message box to review before sending. Press send while still dictating and the message waits for the transcript, then sends.
Edit a message
Hover a message you sent and click Edit message. Change the text and click Send: the conversation continues from the edited message.
Autocomplete
As you type, the message box may offer a grey inline completion. Tab accepts it; keep typing to ignore it. After a task finishes, the empty message box may suggest a likely next prompt, which Tab accepts too.
Shortcuts
| Shortcut | What it does |
|---|---|
| Enter | Send |
| Shift + Enter | New line |
| Tab | Accept the grey autocomplete |
| @ | Open the file and standards picker (Mentions) |
| / | Focus the message box from anywhere |
| Esc | Close the picker; press twice to clear the message box |
| ↑ (empty message box) | Edit your last queued message |
| ⌘K / Ctrl+K | Search past conversations |
Account menu settings
Open the account menu at the top-right to see Usage. To change the Step limit, open Personal Account, Account, or Organization, then Settings → Agent. See Account & Settings.
Next steps
Mentions & Attachments
Tag files, folders, and design codes with @ instead of re-uploading.
Your Standards Folder
What the My standards toggle points at.
Work in a Project Folder
Keep a job’s files, chats, and deliverables in one place.
The Canvas
Where the documents you ask for take shape.
Email support@stru.ai for help.